A typical solar installation begins with evaluating the roof’s orientation and condition, followed by consultations to understand energy needs. Next, a custom solar system design is created, focusing on efficiency and compliance with local codes. Necessary permits are secured, and the system is wired to connect to the electrical grid. After inspections confirm safety and code adherence, the system is activated for generating electricity. Regular monitoring and maintenance keep the system running effectively, leading to energy savings. Exploring further will provide additional insights.
Key Takeaways
- Assess the roof’s conditions and homeowner’s energy needs to design a custom solar system.
- Obtain necessary permits and approvals, ensuring compliance with local codes and regulations.
- Install the racking system and solar panels securely, ensuring alignment and structural support.
- Connect wiring for safe energy transfer, followed by municipal inspections for code adherence.
- Activate the system, monitor energy production, and perform regular maintenance for optimal performance.
Initial Assessment of Roof Suitability
When evaluating the suitability of a roof for solar panel installation, it is essential to take into account several key factors that can greatly impact the system’s performance. The initial assessment involves checking the roof’s age, condition, orientation, and pitch, with a preference for a south-facing slope between 15 and 40 degrees to enhance efficiency. Additionally, evaluating shading from trees or structures is vital, as excessive shade can limit energy production. The roof should also provide enough space for at least eight solar panels, meeting the household’s energy needs. Most UK roofs can support solar panel systems, rated for approximately 10 kg per square meter, while some installations may require planning permission, depending on local regulations and roof type. Some panels, like those with MPPT technology, offer enhanced efficiency, even in less than ideal lighting conditions.
Consultation and Energy Goals

How can homeowners guarantee their solar energy system aligns with personal energy needs? The consultation phase involves a detailed assessment of homeowners’ energy goals, such as reducing electricity bills or ensuring reliable backup power. An analysis of past electricity bills reveals consumption patterns, which is essential for determining the correct size of the solar energy system. A thorough site evaluation examines roof condition, orientation, and potential shading from nearby structures, all of which impact solar performance. After this evaluation, a custom solar energy system is proposed, detailing costs, energy production estimates, and anticipated savings. This extensive proposal empowers homeowners to make informed decisions, ensuring that the solar installation meets their unique energy needs effectively. Furthermore, homeowners should ensure that quality materials are used in their solar installation to guarantee long-lasting performance and maximize energy efficiency.
Custom Solar System Design
Custom solar system design involves a systematic approach that begins with a thorough consultation to identify the homeowner’s specific energy requirements. This process analyzes past electricity bills, determining consumption patterns essential for sizing the system effectively. A detailed site evaluation follows, evaluating roof condition, orientation, and shading to guarantee optimal placement of solar panels. The proposal for the custom solar system includes the selection of components, such as solar panels and solar inverters, alongside estimates of energy production and potential savings. By understanding these details, homeowners can make informed decisions about installation. Before the actual work begins, design compliance with local safety codes is necessary, which involves securing permits and approvals that ensure a smooth shift to a sustainable energy solution. It is important to consider bristle quality for maintaining solar panel cleanliness, as it significantly impacts the panels’ efficiency and longevity.
Securing Necessary Permits
Securing the necessary permits is a crucial step in the solar installation process, guaranteeing compliance with local regulations. Homeowners must obtain these permits from the Authority Having Jurisdiction (AHJ) before commencing work. The permitting process often requires a site plan, which outlines the proposed layout of the solar system, along with schematics and certification documents to guarantee technical compliance. Additionally, homeowners in HOA communities may need to obtain approval from their association, potentially affecting installation timelines. Approval times can vary greatly, ranging from weeks to months based on local regulations. Some solar installation companies offer permitting services, simplifying the application process for those who prefer a more hands-off approach. Planning for these details is essential for a smooth installation experience. Regular solar panel inspections are recommended every 6 to 12 months to ensure systems operate effectively and efficiently.
Utility Interconnection Agreement
Completing the permitting process sets the stage for the next critical step: establishing a Utility Interconnection Agreement (UIA). This agreement is essential for connecting a solar energy system to the grid, as it guarantees compliance with the local utility’s safety standards and technical requirements. The UIA application requires detailed system designs, including inverter specifications and the system’s production capacity. Utilities often demand additional permits, like the G99 application, for systems exceeding 3.68kW. Approval times vary, typically ranging from a few weeks to several months, influenced by the utility’s workload. Once approved, the utility will install a meter to monitor energy generated, allowing for potential net metering, which credits homeowners for the excess energy sent back to the grid. It’s important to ensure that mounting brackets used in the installation meet the necessary compatibility and weather resistance requirements to avoid future compliance issues with the UIA.
Preparing the Installation Site
Preparing the installation site is a fundamental step in the solar panel installation process. First, assess the roof condition to ascertain it can support the solar panels, which weigh around 10 kilograms per square meter. Verify the structural integrity of the roof, checking for any weaknesses. It is essential that roofs are ideally south-facing with a slope between 15-40 degrees for peak energy capture. In some cases, scaffolding may need to be erected four to five days before the installation, guaranteeing safe access. Additionally, clearing debris and organizing tools are important for efficient installation. Finally, confirm whether planning permission is required, especially for unique properties such as listed buildings or ground-mounted systems, to ensure compliance with local regulations. Considering the battery capacity of emergency power backups is also crucial for ensuring that the system continues to operate effectively during any potential power outages.
Installing the Racking System
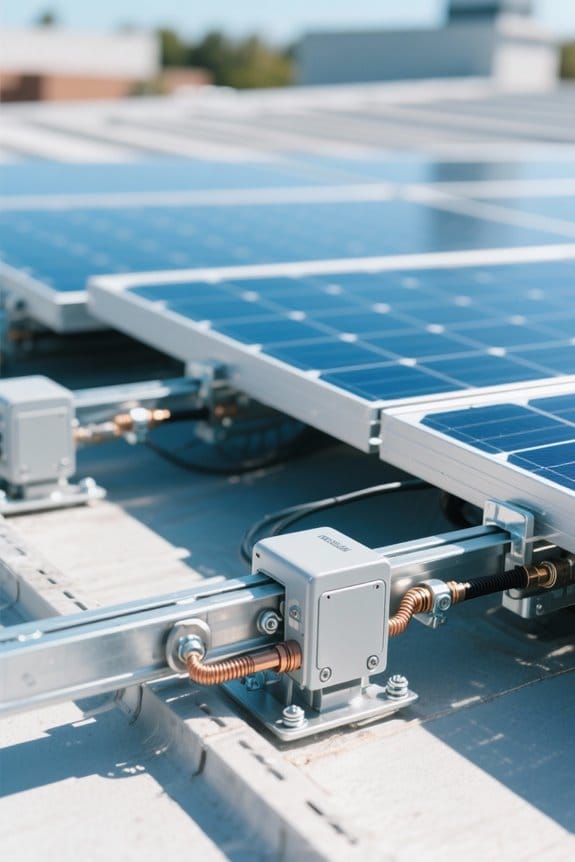
Installing the racking system serves as a critical phase in the solar panel installation process, providing the necessary foundation for securely mounting the panels. This installation typically starts by locating and marking the roof rafters with a stud finder, which guarantees ideal structural support for the racking system. The racking components, including mounting brackets, rails, and clamps, are essential in creating a robust framework for solar panels. It is crucial to verify that the racking system remains level and well-aligned to enhance solar panel performance and prevent drainage issues on the roof. The process further involves securing mounting brackets using lag bolts and applying waterproof flashing to prevent leaks, thereby maintaining the integrity of the roofing material. Additionally, selecting durable, weather-resistant materials ensures the longevity and reliability of the racking system in various environmental conditions.
Mounting the Solar Panels
Properly mounting solar panels is vital for maximizing energy efficiency and ensuring the longevity of the solar energy system. The installation begins by securing mounting rails to the roof, providing a sturdy foundation for the solar panels. This racking system is attached to roof rafters, ensuring stability and proper alignment. Before attaching the solar panels, microinverters must be affixed to the backs of the panels or string inverters installed close by to facilitate ideal electrical connections. Grounding mid clamps connect consecutive panels, and end clamps secure the last panel in a row, ensuring each panel is firmly held in place. Accessibility is essential for future inverter maintenance, so installers should follow all manufacturer guidelines to maintain system performance. Additionally, utilizing adjustable solar panel tilt mount brackets can significantly boost energy output by optimizing the angle of sunlight capture.
Wiring the System
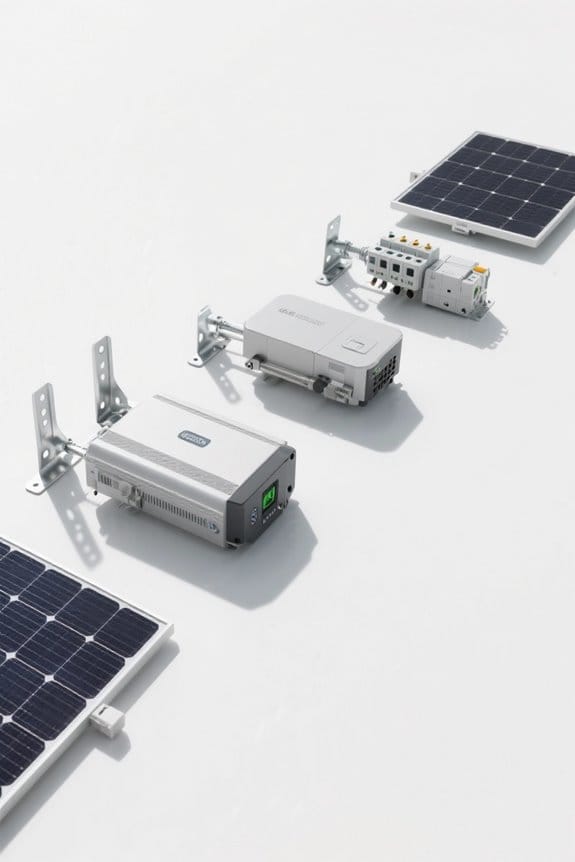
Wiring a solar energy system involves essential steps to guarantee maximum functionality and safety. The installation typically requires three primary types of cables: DC cables, AC cables, and communication cables. DC cables connect solar panels to the inverter and must be suitable for outdoor use, ensuring they are UV-resistant. Proper gauge selection minimizes voltage drop, based on panel-inverter distance. AC cables lead from the inverter to the distribution board. Wiring connections should be securely fastened and waterproofed, particularly at junctions, to prevent corrosion. An inverter, which converts DC to AC electricity, can be wall-mounted near the solar array or connected via microinverters. Adhering to local electrical codes and proper grounding practices enhances overall system safety and longevity. Utilizing high-quality controllers enhances overall system efficiency, ensuring optimal energy management and longevity.
Inspections and Compliance Check
Once the installation of a solar energy system is completed, an essential step involves undergoing a municipal inspection to verify adherence to local building codes and safety regulations. Homeowners may need to be present during these inspections, allowing access to the roof, inverter, and electrical wiring. Prior to installation, permits must be obtained from local authorities, which can take 2 to 4 months, depending on the jurisdiction. For grid-tied systems, especially those with inverters over 3.68kW, utilities require a final review, necessitating a G99 application for compliance. A signed inspection record from the local building department is vital for obtaining Permission to Operate from the utility company, ensuring the solar system can be connected to the grid safely. Solar-powered fans are designed with weather-resistant materials to ensure durability in outdoor installations.
Commissioning and Activation
Following the completion of inspections and compliance checks, the commissioning and activation phase begins for a solar energy system. During commissioning, technicians perform a final inspection and conduct tests on electrical connections and system operations, ensuring all safety measures are in place and compliant with industry standards. Once verified, the activation phase connects the solar energy system to the grid, allowing it to commence electricity generation for the homeowner. Next, registering the system with the utility company secures interconnection and any applicable export tariffs for surplus energy generation. Additionally, an energy production monitoring system is established, enabling homeowners to track their solar energy generation and consumption in real-time, contributing to informed energy management and efficiency.
Monitoring and Maintenance
Effective monitoring and maintenance are essential for the longevity and efficiency of solar energy systems. Continuous monitoring software connects to home Wi-Fi, allowing homeowners to track real-time energy production and consumption, ensuring peak operation. Regular maintenance checks are crucial, as they help identify issues that could impact performance and prevent costly downtime. While solar panels are durable and have no moving parts—resulting in infrequent mechanical failures—routine cleaning, especially in dusty areas, is recommended. Utilizing a soft brush and mild soap maintains panel efficiency. Additionally, monitoring systems provide alerts for significant drops in energy production, empowering homeowners to make informed decisions regarding energy usage and necessary maintenance actions for sustained performance.
Frequently Asked Questions
How to Install a Solar System Step-By-Step?
To install a solar system, conduct a site assessment for roof compatibility, select appropriate solar panel types, utilize installation tools, size the system correctly, adhere to safety protocols, and incorporate energy storage with maintenance tips for longevity.
What Are the Stages of Solar Installation?
The sun represents renewal, guiding the stages of solar installation through diverse panel types, careful roof considerations, strategic system sizing, efficient inverter selection, a detailed permitting process, mindful installation timelines, enticing solar incentives, and ongoing maintenance tips.
What Are the 8 Steps in the Overall Solar Process?
The overall solar process includes site assessment, system design, equipment selection, permitting process, installation timeline, grid connection, final inspection, and an ongoing maintenance plan to guarantee efficiency and longevity of the solar energy system.
What Is the 33% Rule in Solar Panels?
The 33% rule dictates that shading effects should cover no more than 33% of solar panels to guarantee ideal energy output, affecting installation costs, panel orientation, inverter types, roof suitability, and system maintenance decisions.


